Logging into your computer instance “in the cloud” (Windows version)
In an effort to make things go more smoothly today, I eliminated a step that users on Windows operating system usually have to perform. If you ever find yourself connecting to an Amazon EC2 instance on Windows and need to generate a ppk file from your pem file, see here
There are a few images here to guide you because I do not plan to demonstrate the Windows operating system route during the workshop.
Logging into your EC2 instance with Putty
You’ll be provided with the network name, a.k.a. public DNS, of your
virtual machine. This is the public name of your computer on the
internet. It will look something like
ec2-174-129-122-189.compute-1.amazonaws.com, for example.
Connect to your particular virtual computer using PuTTY using the
username ubuntu, as follows.
If you prepared in advance, the key provided for today should be on your Desktop already.
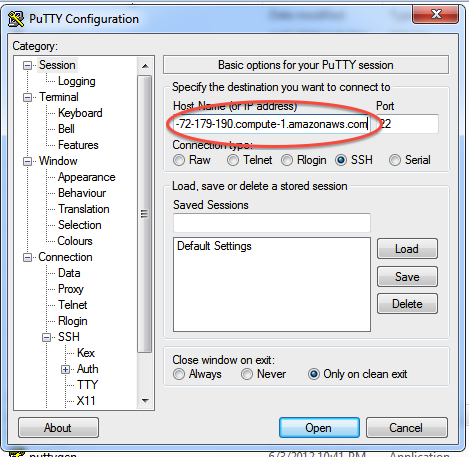
Open up PuTTY, and enter your virtual computer’s network name into
the Host Name box. Just leave everything else in the window as it
is.
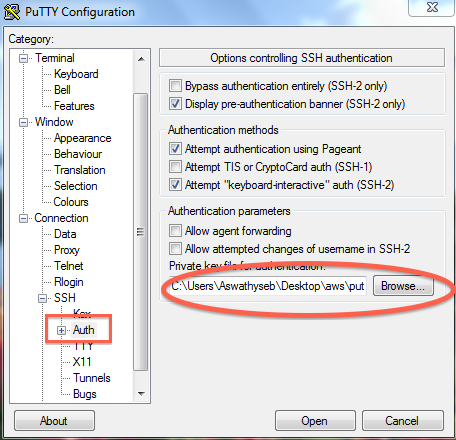
Now, you need to point PuTTY to the key file. In the left side of your
PuTTY window, go down and find the SSH section, select Auth and
in the bottom of the window on the right use the Browse button to
locate the workshop.ppk file provided to you via email and sitting
on your Desktop. Then select Open.
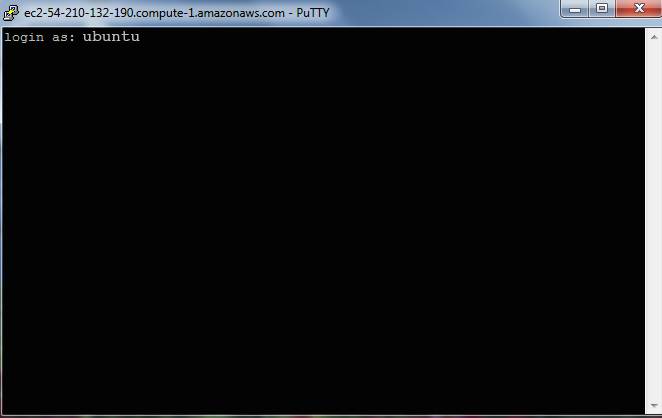
At the prompt log in as ubuntu.
Some information should scroll by and at the bottom you should now see a
text line that starts with something like ubuntu@ip-10-235-34-223:~$
as in the image below.
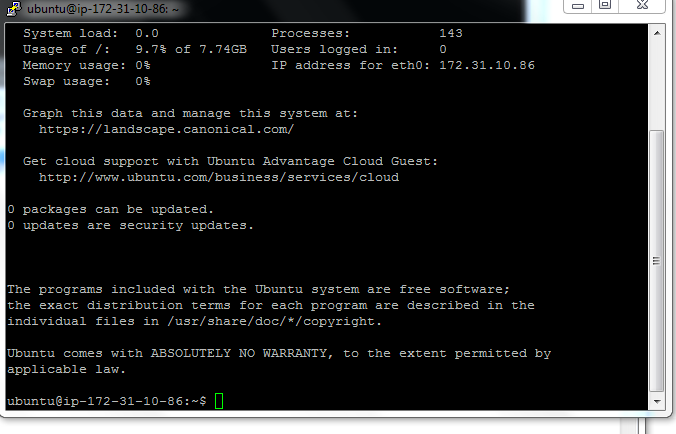
You’re now officially connected to the machine at Amazon Web Services. Hooray! But you have have one last, IMPORTANT step to totally take control.
Type:
sudo bash
cd /usr/workshop
The first command restarts the bash shell with you using the machine as
the super user and the second sets you in the directory where we will
work today usr/workshop. You have to issue these commands each time
you login; these settings don’t persist.
This is where we will begin today and it after this it will be much like you are working on your own computer’s command line.
OPTIONAL: To check out what you have you can type the command below to see
df -h
Exiting
(You probably won’t need to do this today.)
To log out, type:
exit
logout
or just close the terminal or Putty window. (You cannot do this step wrong because ultimately you (or me, for today) have control of the instance in Amazon Web Services console.)